Control of Injection Mold Cavity Polishing Grade
The polishing grade of an injection mold cavity directly determines part surface finish, ejection performance, and mold lifespan. Proper polishing ensures uniform melt flow, reduces mold sticking, and prevents defects like weld lines, gas marks, and residual stress. This article provides a step-by-step guide to controlling polishing quality, from material selection to post-polishing protection, with detailed best practices to achieve consistent, high-quality results.
I. Selection and Raw Material Adaptation
Polishing grade is defined by surface roughness (Ra value) and must align with part requirements and material properties:
Ordinary Civil Parts (PE/PP): Ra0.4-0.8μm. Low-viscosity plastics like PE and PP have a higher tendency to stick to mold surfaces, so a moderate polishing grade ensures smooth ejection without excessive surface friction.
Medium Finish Parts (ABS Enclosures): Ra0.1-0.4μm. These parts require a smooth surface to avoid visible flow marks and ensure consistent paint adhesion for subsequent finishing processes.
High-Gloss/Mirror Parts (PC/PMMA): Ra0.025-0.1μm. Transparent or aesthetic components demand a defect-free mirror finish to maintain light transmission and visual appeal, which requires meticulous polishing to eliminate even micro-level scratches.
Food/Medical Grade Parts: For applications where hygiene and material purity are critical, the polishing grade must meet both surface roughness standards and contamination-free requirements, often requiring a mirror finish (Ra0.025μm) combined with post-polishing ultrasonic cleaning to remove all residues.

For material adaptation: low-viscosity plastics (PE/PP) require higher polishing grades to reduce sticking; glass fiber-reinforced plastics need hardening treatment after polishing to resist abrasive wear from filler particles. Stainless steel molds for food/medical use also benefit from passivation after polishing to enhance corrosion resistance and prevent bacterial adhesion.
II. Pre-Polishing Preparation
Surface Preparation: Ensure no obvious tool marks remain from machining, with a tolerance of ±0.01mm. Any deep scratches or machining defects will be amplified during polishing, so it is critical to address these in the pre-processing stage. Clean the cavity thoroughly to remove iron filings, oil, and coolant using ultrasonic cleaning and ethanol, as residual contaminants can cause uneven polishing or surface blemishes.
Material Pretreatment: For quenched steels (S136, SKD61), perform stress relief annealing at 550-600℃ to eliminate internal stresses from heat treatment, which can cause deformation during polishing. For stainless steels (HPM38), remove the passivation layer using a mild acid solution to improve the adhesion of polishing compounds and ensure uniform material removal. Pre-hardened steels (P20, 718H) typically require no pretreatment but should be checked for surface uniformity before polishing begins.
III. Phased Polishing Process
Rough Grinding (Ra1.6-3.2μm): Use 80#-240# diamond sanding tools to remove machining marks, ensuring a flat surface with no significant unevenness. Focus on maintaining consistent pressure and avoiding over-grinding in localized areas, which can lead to dimensional deviations. For complex cavity geometries, use flexible abrasive pads to reach curved surfaces and corners.
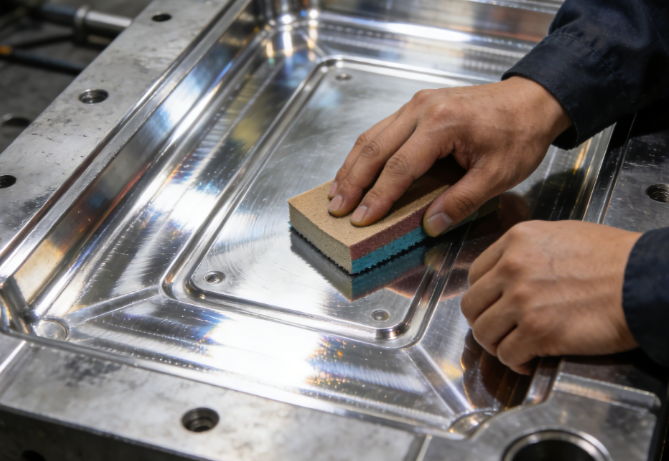
Semi-Finish Grinding (Ra0.4-1.6μm): Use 400#-800# sandpaper and diamond paste, combining mechanical and manual polishing to eliminate rough grinding marks. Maintain a consistent polishing direction to avoid cross-hatches, and use a light, circular motion on curved surfaces to ensure uniform material removal. Clean the cavity with a lint-free cloth and ethanol between grit changes to prevent contamination from residual abrasive particles.
Finish Grinding (Ra0.05-0.4μm): Use 1000#-2000# sandpaper and W3.5-W7 paste, focusing on uniform, light pressure to avoid orange peel defects. This stage requires patience, as excessive pressure or uneven movement can create micro-waves on the surface that are visible in the final part. For mirror-grade applications, this step may involve multiple passes with progressively finer grits to ensure a smooth base for the final polish.
Mirror Grinding (Ra0.025-0.05μm): Use W0.5-W3 paste with a felt or leather pad in a dust-free environment, using circular motions to achieve a defect-free mirror finish. The polishing area must be isolated from airborne particles, as even a single dust particle can scratch the surface. After polishing, use a clean, dry cloth to remove all paste residue, then inspect the surface under high-intensity light to ensure no micro-scratches or blemishes remain.
IV. Quality Inspection and Post-Protection
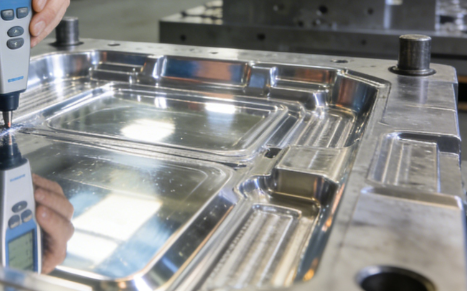
Quality Inspection: Measure Ra value with a surface roughness meter at multiple points across the cavity to ensure uniformity, with deviations not exceeding ±0.02μm for mirror finishes. Check dimensional accuracy with a dial gauge to confirm that polishing has not altered critical tolerances, and visually inspect for scratches, orange peel, and pinholes under magnification. For food/medical molds, perform a contamination test using a white lint-free cloth to ensure no residual polishing compounds remain.
Post-Protection: Avoid direct hand contact to prevent corrosion from skin oils, apply a thin layer of anti-rust oil, and wrap the mold in plastic film for storage. Before test molding, clean the cavity with ethanol to remove all traces of oil, as residual contaminants can affect part quality. During production, regularly inspect the cavity for wear and perform minor touch-up polishing as needed to maintain surface integrity.

V. Common Polishing Defects and Solutions
Orange Peel: Caused by excessive pressure or uneven abrasive movement during finish grinding. Solution: Reduce polishing pressure, use finer grit compounds, and maintain a consistent circular motion.
Pinholes: Often result from gas porosity in the mold steel or residual contaminants. Solution: Use high-quality, vacuum-degassed mold steel and ensure thorough cleaning before polishing.
Scratches: Caused by contaminated abrasive pads or dust particles. Solution: Use fresh, lint-free cloths between grit changes and polish in a dust-free environment.
Over-Polishing: Can lead to dimensional deviations or surface thinning. Solution: Mark reference points before polishing and measure dimensions at each stage to monitor material removal.
VI. Conclusion
By following this systematic polishing process, manufacturers can achieve consistent, high-quality cavity finishes that meet part requirements and extend mold life. Proper pre-treatment, phased polishing, and post-protection are essential to ensuring long-term performance and reducing maintenance costs. For critical applications like food/medical components, adhering to strict contamination control and polishing standards is non-negotiable, as even minor defects can compromise product safety and performance.
